Thursday, August 11, 2011

House portraits - done.

Click photo to enlarge
Here's a collage of house portraits I've completed.  I also finished two others but they are meant to be surprise gifts so it wouldn't be a good idea to show them yet on the blog.  You can see one person wanted hers to be more of an illustrated holiday theme so she could use the cards as Christmas card.  This helped break up the routine of the same-ness of this project.

It has been such a fun project and one I'd recommend to any artist.  Each portrait is 5" x 7".  I matted each one with white matt and also gave a 6 pack of cards with each portrait that they may reorder at any time for the regular price of $12.00.  I packaged the portrait and the cards in a cellophane bag and tied them with a raffia bow.

Monday, July 25, 2011

Watercolor house portraits ...

Two finished house portraits

I've been busy working on the house portraits that were commissioned during the Art Show and Sales event that took place on the 9th of July.  Above are two of the house portraits I photographed this afternoon.   I finished and delivered another but forgot to photograph it.    

I like the presentation package I came up with.  Each 5" x 7" painting is matted with a 8" x 10" white matt and foam core backing and encased in a clear envelope.  The package of 6 note cards is in a clear package and attached to the front of the painting with a small piece of double stick tape.  Both are then placed in a larger clear envelope and a bow of raffia encloses the whole package of note cards and painting together.  A nice presentation for the owner of the house.

This is the first time I've really done house portraits. Do you have experience with this type of commission?  Would you consider doing house portraits?  

Monday, July 11, 2011

Saturday's Art Show and Sales

7" x 5" watercolor sketch, matted to  10" x 8" with matching note cards

Remember me telling you about the Art Show and Sale ?  Well Saturday was the day and the weather was perfect for such an event.  It was well attended and a huge hit with both the vendors (aprox. 20) and attendees.  

Lunch could be purchased for a $5.00 donation, proceeds going to a local school.  The menu consisted of a glass of wine, sandwich wrap, 2 salads, 2 asparagus spears, and a huge strawberry,  all served on a small clear plastic plate with a paper doily.  It was a masterpiece in its self .  Attendees could help themselves to dessert of either a lemon bar or brownie or both.  As you can imagine the food was a huge hit.  

I usually try to come up with something new for each of these shows and this year I offered a 5" x 7"  watercolor portrait of the purchasers home, matted to 8" x 10" and a free pack of 6 matching note cards.  I felt I could only offer it to 5  buyers because my schedule from August through November is very full and wouldn't have time to finish them after August.  I sold out with-in the first hour.   And, it was so fun to offer something that so many people were interested in.  I even took two more orders from people who swore they didn't need the portrait until after the first of 2012.   

The show was well advertised and it showed that those in charge had worked hard to make it the great event it was.  

Now time for me to get back to work and get some painting done ....

Tuesday, June 21, 2011

Is my face red?

How embarrassing ... Last night as I was cleaning up my studio I found step #4 of Franks Serrano's Step by Step under some paperwork on my desk. I didn't remember seeing it before.  I was happy to see it yet since I had already posted the photo of what I thought was finished I was a little embarrassed.  Oh well, what to do but attempt to make it more finished.

I stayed up and worked a little more on it as well as some this morning, but, I'm stopping now.  Too much sticky paint.

I wish it would have been my photo reference so I'd 'know' what I was looking at in Franks demo.  Even though I am not sure of all the detail I do think it looks better since I worked on it more.

8" x 8" on paper


This photo of Franks finished work shows what the painting was suppose to look like.

Monday, June 20, 2011

Another Frank Serrano Step by Step

I should have been working on Exercise #17 of Charles Sovek's book Oil Painting Develop Your Natural Ability today, especially since we are finished with the house painting, but in #17 he wants you to have a person pose for you while you paint the person sitting and the shadow predominates so only a third of the figure is in light.  So, maybe in a day or so when we have sun and I can get the poser to nap sit for me while I paint.

Meanwhile, I remembered I still had one more Frank Serrano Step by Step I had saved. (I think I found these on American Artist web-site some time ago)
You can see the first Frank Serrano step by step I did here.


Oil on paper ~ aprox. 8" x 8"


I would rather have painted a scene of the Northwest, but it was still nice to get my brush in the oils again an try to think shapes as I attempted to read what he suggested in steps 1, 2 and 3.  

As I was painting I was thinking it didn't have enough detail, but now that I'm finished I think it has just the right amount of detail, especially since the title of his lessons were How to Paint en Plein Air: Beginner Landscape Oil Painting.


The top photograph is my take on Frank's Lesson 2:  Conveying Time of Day.  The second is the photo of his finished lesson.

Can you tell what time of day it is suppose to be?  You may find it easier to guess by looking at Frank's finished painting, but it was tough for me to tell.  All in all I'm happy with this one.  Not perfect, but still pretty good.   What do you think?

Saturday, June 18, 2011

Still learning

Back in March I told you I was working through Charles Sovek's book,  Oil  Painting Develop Your Natural Ability.  I am finally getting back to where I left off at that time.  About 3 weeks ago I started on Exercise #16 and promptly got buried with a number of other things and couldn't finish this easy (?)  exercise.  In his book he suggest working outdoors where you have direct sunlight striking your object.  At that time it was raining here and the sun was only a memory.  Instead I pick a photo that I had showing light and shadow very well after I put it in Photoshop and turned it into a black and white.

Click to enlarge this group of photos
The photo I chose was a street scene, plenty of light and shadow.  I was to lay in opaque passages of blue for the shadows and cad orange and white for the lights.  That was when I got interrupted and didn't get back to it until now.  I did keep thinking about this when I was off doing other things and told myself "remember, big shapes", then "remember little shapes.  You know, after the painted in the big shapes, I became frozen... "what now?"....  deep breath ...  "this isn't rocket science but canvas and paint ... if you mess up its nothing serious, move on."  So I did, I kept working, not thinking of how the finished painting would look, only of shapes.  Keeping the sunlit areas warm, the shadow area cool.
I'm finished with this one but think I need to attempt this exercise again when I can do it all in one sitting.   The title of this exercise is "Using full color to show the various home values of objects within the light and shadow patterns of a composition."  I will attempt this one sometime when I can be outside and see the colors better and not just the muted shapes in a photograph.

On to exercise #17.

Monday, June 13, 2011

Plain air easels, ohhhh my

I have come to realize when its time to make a choice between two or more things, no matter what the things are, it's going to be tough for me to make a final decision.

Now that I'm trying to learn oil painting, I think ... I plan on doing, plenty of plein air painting. Years ago I had purchased a full Mabef French easel, not realizing how much it would weigh once I had filled it with paints, brushes, turps, etc. Plus its awkward if caring it any distance.

Recently I've been researching plein air easels and I found that there were plenty to choose from and a lot to consider.  Weight, price and size were my main considerations.  It makes a girl dizzy just looking at all of the types of plein air easels out there.  I wanted something that was light weight, sturdy and relatively small, and not break the bank.  I wanted to be able leave the house at any time and not worry about forgetting something.

It was a tough decision and I finally narrowed it down to 3, the Easy L Lite,  the Coulter Plein Air System, and the 9" x 12" Guerrilla Box.   I was able to make my final decision based on all three of my needs.  Price, weight and size.  I purchased the Guerrilla 9" x 12".  I was fortunate to find a new Guerrilla Paint Box up for auction on Ebay (a friend found it for me on-line ... thank you Nancy) and won it for $69. A huge savings off the regular price of $179.  It weights 5 lbs. but built solid and sturdy.  Also, I was really sold on the idea that I can carry paint, turps etc all in the 9" x 12" paintbox.  (I realize the weight will change once I pack it full of paint etc. ) And, its balanced so I can set it on a a table or use a tri-pod.  I can grab my box and walk to the waters edge or paint out on the deck and have everything with me and ready to paint.

Its been a tough decision and one I didn't take lightly.  I realize I'm new to oil painting and in time, after more experience, may change my mind. But for now I'm thrilled to have finally made a decision and a purchase.  Yippee, that decision has been made!


Tell me, did you have as tough a time picking out your plein air easel?  Did you have requirements you felt you had to have?  Were you able to get them all in your plein air easel choice?  Have you changed your mind and bought a second easel having realized you wanted something else?

Friday, June 10, 2011

That time of year ....


I realize I haven't posted on my blog for awhile, but its not that I haven't been busy.  I was asked to design a flyer for our little local art event and that took a bit of time.  I was given the words as well as the photos of artists work, I just had to put them all together in a manner that  looked good.  I think I accomplished that, what do you think?


Click to enlarge

Don't think I haven't been painting up a storm.  This time I'm using acrylic latex satin enamel. You guessed it, we are painting the outside out our house.  Whew, I'm beginning to see the end in sight so maybe before long I can post some work in oils.  Its that time of year when we find things that keep us busy both inside as well as outside.  Happy painting.

Tuesday, May 24, 2011

Thanks Frank ... (and Kevin)

I'm still trying to 'get it'.  Block in the shapes.  How hard can that be right?  The other day I found a step by step  from American Artist Magazine.  Frank Serrano gave directions, step by step, on how to start a painting.  The name of the article  was "Paint En Plein Air:  Beginner Landscape Oil-Paintnig Techniques From Frank Serrano".  Wow, I thought, maybe this is just what I need.  I have never really done a step by step and looking at his painting and the steps along the way, he made it look as if it was something I could complete ... and get right.  Maybe I would finally 'get it' after all.


The above photo is Frank's (Frank Serrano) finished painting.  What my painting would look like when I completed all of his steps in the article.  ....( yea, right ).  I had my canvas,  a small 4" x 6 "  I thought small would be best and let me finish faster.  I've got to stop that.  Small isn't necessarily better, in my case anyway.


I was very impressed with his instructions, his step by step. He was very thorough, even telling what colors he mixed to make the different painted passages.  I'm thinking "how could I miss" with all the details he was giving.  Soooo, when I got to the end of the article, the above photo is what I had accomplished.  I was so disappointed.  It looked horrible, it wasn't any better than I'd done before. Being frustrated I grabbed a Kevin MacPherson book and headed to the recliner to once again read about the process of painting.   Ah haa.... there it was,   I wasn't finished .... I just had the basic shapes down.  Now was the time to go into the larger shapes and put down smaller shapes.  I've never done that before!  I've read about it and thought about it prior to picking up a brush, but now I went back to my painting and start to put down the smaller shapes.  


The above picture is after I went back in and put in more shapes.  Yippee, I think I'm finally getting it.  No, I'm not mistaken by thinking this is a great painting ... Its great because I finally understand and have done what I'm suppose to.  Big shapes, then add the smaller shapes after all the large shapes are down!  Frank had said that, but I just hadn't read it that way.

I really appreciated the step by step as it made me finally realize about the blocking in of the large shape process.  But, if I were to change anything about the article it would be that  I could have seen a reference photo of the area and not just attempt to 'copy' Franks painting with out knowing 'why'.

There is still one more step by step he offered in the download and I'm thinking I'll give it a try also.  Who knows maybe I really do finally understand.

Sunday, May 22, 2011

Are your roses blooming yet?

I have a friend who lives in France who paints the most beautiful flowers and she tells me her roses are blooming now.  

This small little rose painting is no where near the beauty that she paints, but I thought she might appreciate seeing that I am thinking of her and her beautiful paintings.


3 1/2" x 3 1/2"  oil on wood block                                                                     

Friday, May 13, 2011

Garlic ~ a veggie?

3 1/2" x 3 1/2" oil on wood block

Although I've been looking forward to starting a new oil painting since my return from vacation I keep running into obstacles.   Yesterday with some garlic in hand I went to the studio and  decided that I'd paint a small painting for Daily Paintworks weekly challenge, which happens to be Paint Your Vegetable this week.  


~  I had gessoed a number of these small wood blocks awhile ago and thought they 
would make nice little paintings if shown in a grouping.   Although the size is attractive, I find them a little small to hold and try to paint, yet, I was having a hard time keeping it on my easel  because of the 1/2" thickness of the board.  Since painting this and taking a good honest look at it, I've decided that I'm not pleased with it and won't be posting it to the  weekly challenge.  Maybe I'll try another challenge or attempt another vegetable.  Also, the real painting doesn't have this bright yellow in it, but I couldn't seem to get rid of it with photoshop.

Sunday, May 08, 2011

Nancy ... where have you been?


Watercolor sketch - somewhere in the Caribbean islands............

I bet you didn't even miss me ......  If you didn't that's because that is just how I had hoped it would be.  I had painted my boat yard painting prior to leaving and took pictures as I finished each step and then scheduled the postings.  This is the first time I've used that particular blogger feature and I can see where, if you painted ahead a lot, it could come in handy.

I wanted to tell you all that I really appreciate all the comments I received on my boatyard painting.  I particularly love the tips I received.  Invaluable.  I've started a notebook to keep such suggestions and hopefully will not just write the tips down, but read and utilize them as well. Thanks bunches.

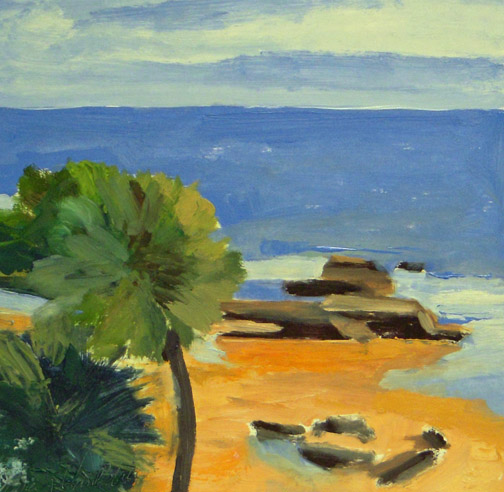
~~~  this little watercolor is a typical scene in the Caribbean.  I used a 140 lb. Arches watercolor scrap, painted to about 4" square,  that I had laying around.  I painted this from memory.  Trying to remember the beautiful white sand, the unbelievable turquoise water (who ever heard of such a thing?) and beautiful bright sky with huge white billowing clouds.

Tuesday, April 26, 2011

Finished ....


I'm finished.  I think I was too uptight when painting this one, but I'm ok with the finished product.  Give me your thoughts?  Do you have any tips you can share that I could try on my next attempt? 

Thursday, April 21, 2011

And more......


I'm now thinking I might be getting too picky.  I really would like to paint in loose style, but I don't see it happening on this one.

Tuesday, April 19, 2011

A little more work done ...


I'm not sure you can tell, but I've done a little more work on the painting.  I particularly enjoy adding the rust to the boat.  Give me more rusty boats.  Fun to paint maybe but not fun to work on in the boat yard.

Thursday, April 14, 2011

Adding more color ...


Even though I'm getting more color on the board I'm not feeling all that comfortable as an oil painter yet.  I'm sure with experience I will learn to breath as I paint ... *grin.  I think I am finally learning to wipe my brush off after I apply paint instead of going right into my turps and clean the brush.  I was really getting some dirty thinner/turps and am glad to be changing that habit.  

Tuesday, April 12, 2011

The next step ...


I was a little nervous when trying to get some sky color on my support.  What colors should I mix ... how do I 'say' it was a sunny day?  All parts of my attempt to learn.  I was painting this from a photograph and I don't think the sky reads the same as in person.  Anyway I am moving forward, writing down some thoughts as I continue on.  If you are wondering what that is in the bottom right corner, its a bulldog clip, holding my support onto my easel ...

Thursday, April 07, 2011

The beginning ...

I think a lot of you know the kind subjects I want to paint.  I'm mostly interested in sea and landscapes.  I am very interested in my surroundings of  boats, saltwater, sea life, and birds of the pacific northwest.  Knowing this you won't be too surprised to see the first subject to be painted on my freshly gessoed supports will be a boat.  This reference for this painting was a boat I saw in a 'bone yard',  slang for an area where old or discarded boats etc. are collected before being disposed of.


Above I was playing around with some thumbnails.  Just getting the hang of seeing the boat and the  drawing in the square format.  I decided it was ok and plunged forward.


I was really happy with the warm underpainting I chose for one of my 10 minute Apple exercise
 a few posts earlier and I wanted to try that again.  I chose this bright yellowish gold.  Next I
 used drew a grid and my drawing on the support with a ball point pen.  I don't think I would
ever have thought of using a ball point pen but I had read on Terry Miura's
March 18th blog post that he had used it andI am up for experimenting to see just
what I like and don't like when it comes to any part ofmy new oil painting journey.

I think I'm off to a great start.

Sunday, April 03, 2011

Getting ready to get ready


Having a full, well almost a full, bucket of acrylic gesso I decided it was time to gesso some wood and masonite in anticipation of putting some paintings on them.  Somewhere I had read a small sponge roller works well with gesso and I did think it worked very well.  Although being new to oil painting I'm not really sure what texture I should be looking for to paint on ... so this looked great to me after I gave the supports three coats.  I had one masonite piece and forgot to paint the back or at least put an X of gesso on the back.  I also had two 9" x 9" wood panels and 8 small 3.5" x 3.5" wood supports.  On one of the 9" x 9" I did adhere some canvas to it and the other I left just gessoed.  Now I think I'll put a coat of gesso on the canvas as well as the back of the masonite I forgot.  So being I'm new at this ... do any of you have tips or thoughts that I should do next time?

Sunday, March 20, 2011

Some painting exercises ..


I have found too many things to occupy my time lately and have not been doing as much oil painting as I had hoped to.   Here are some of the exercises I have completed since I last worked from the book "Oil Painting Develop Your Natural Ability" by Charles Sovek,.  The next assignment will be working on exercise 16.  I had just glanced at this exercise and for the last week or so assumed it needed me to observe a subject out of doors. Thinking I needed a lot of sun, I have not progressed further.  Having read a little today I see I can work without bright sun. Good. I won't need to wait for three or more months until we see summer.  Lesson learned, 'don't assume' anything.